And now for something completely different!
It is two months before my eldest's Fourth Birthday, the last one before she goes to school so we want to do something a little special involving lots of friends and family. I love making cakes but they are generally of the rustic kind, something tasty and filling but not necessarily the most beautiful of creations! Luckily, my best Friend is an amazing cake maker who has supplied two beautiful Christening cakes and using all her imagination, made a whopping Monster's Inc Cake, which weighed a ton and survived a train journey half way across the country to arrive at P's birthday party last year. Unfortunately, however, she is unable to attend the party this year so I have decided to be brave and turn my hand to attempting a birthday cake. I tentatively ask - 'Darling, what type of party would you like this year?' With finger's tightly crossed it is not too obscure. P goes for a Princess Themed party, OK, not too bad, now the thinking and planning begins.
I finally decided on a Princess Doll Cake using a Barbie Doll as the princess. I was very pleased with the end result and can recommend having a go, it needs a little creativity and a lot of time and patience. (Altogether this took about 3 and a half hours.
Let's Begin - The Cake:
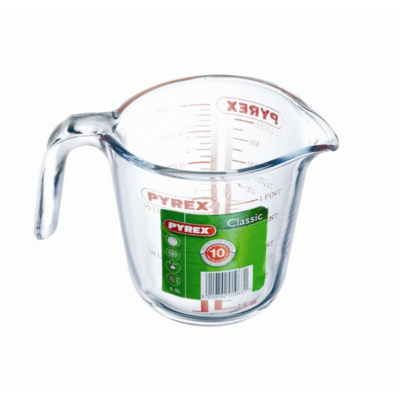
I made 2 cakes, one in a silicone heart shaped mould which formed the base and one in a Pyrex measuring jug measuring 1 litre.
Cake
400g butter softened
400g caster sugar
8 eggs beaten
400g plain flour
4 tsp baking powder
Icing
450g Butter Softened
3 tsp Vanilla Extract
1/4 tsp colour of your choice
750g Icing Sugar
2 tbsp Milk
500g White Fondant Icing
250g Pale Pink Fondant Icing
1. Grease the measuring jug well with butter. Preheat oven to 180 degrees C
2. Cream the butter and sugar in a very large mixing bowl until pale and fluffy then gradually add the eggs with a little flour between each addition to prevent curdling.
3. Sift the flour and baking powder and add to the mixing bowl.
4. Pour into the prepared containers and smooth the mixture out to the sides to prevent a dome forming.
5. Bake for 25-35 minutes but keep watching as the jug baked quicker than the silicone, so had to be removed first.
6. Remove from the oven and let cool for 5-10 minuted until shrunk slightly, loosen edges with a sall knife and invert onto a cooling rack to cool completely.
Icing and Decorating (Please watch the video to help visualise some of these instructions)
1. Wrap the doll's legs in cling film and the hair/ face to keep it clean and out of the way.
2. Make the icing by beating butter until soft, add the vanilla, food colouring and half of the sugar and beat until soft. Add the rest of the sugar and the milk and beat well.
3. When cool slice the bowl cake horizontally to make three slices. Use a circular cookie cutter to make holes through the middle of the three discs of cake for the dolls legs to poke.
4. Slice the base cake in half and seperate all of the layers.
5. Place the base layer onto the cake board and spread with icing, place next layer on and spread with icing.
6. Manipulate the white icing to make soft and roll out to a thin layer about 4mm thick large enough to cover the base cake. Lay the icing over and smooth it round until flat with a polisher.
&. Insert skewers or dowling rods to support the weight of the cake above.
7. Ice the first layer of the bowl cake, ice then place on second layer ice and place on last layer. Place this iced dome onto the rods.
*. Insert doll down into the hole until down as far as her hips (they can sit slightly above). Her legs might just poke a little way into the base cake.
7. Cut a ribbon of icing in white about 20mm thick and pleat around the bottom of the bowl cake where it meets the base cake.
8. Roll out the pink as with the white and cut into a long wide strip to wrap around as the dress. follow the pleats at the bottom and push up slightly to look as though it is resting on the pleats.
9. Cut a ribbon about 20mmm thick to wrap around the bottom of the base cake. If you have an embosser or patterned cutter you can make it whichever design you wish. Stick it on eith a little water or edible glue.
10. Make the dolls bodice (see video for best explanation)
11. Cut a large circle of white fondant icing with a smaller circle cut out of the centre. Scallop the edges of the larger circle and cut a slit right through to enable you to wrap it around the doll.
12. Paint the top of the bodice and around the waist with edible glue and sprinkle on the crystals. Paint the bodice and then paint on the glitter.
13. Using a butterfly cutter, cut out butterflies and rest on the top of an egg box to dry slightly curved. Stick on with edible glue. (These are great to hide any problem areas!)
14. Place a large butterfly on the back of the dress.
Here is a video I used for the decorating. i didn't use this recipe for the cake so you can skip that bit. It gives you an idea of how to build the cake up and inspires decoration although you do have poetic licence with that one.
Video of Doll Cake


No comments:
Post a Comment